AI Content Analysis with the Anthropic API in Google Sheets.

An interesting experiment and precursor to bigger projects, I ask the Anthropic API how to improve the content at a submitted URL.
Today I'm sharing an apps script that "analyses" the content at a given URL in Google Sheets. Using the prompt I've inserted into the example, the output should make recommendations on how you could improve your webpage.
Here's how it works:
Prompt: "Please suggest additional information to include in this article to make it more complete and helpful".
The goal of this script is to work around Claude's inability to fetch external URLs at this point. Obviously, you could just do this in ChatGPT, but where's the fun in that?
Appended to the end of the prompt, I'm adding the text extracted at a URL in cell A1 in my Google Sheet:
  function fetchContent(url) {
    var response = UrlFetchApp.fetch(url);
    return response.getContentText();
  }

  var content = fetchContent(url);
You can edit the prompt if you wish by changing the prompt variable:
  // Edit prompt here
  var prompt = "\n\nHuman: Please suggest additional information to include in this article to make it more complete and helpful:\n\n" + content + "\n\nAssistant:";
You'll need an Anthropic API key (register and purchase credits here). Enter that into cell B1 in your Sheet.
Here's how to form the JSON payload required for an API call to the Anthropic API:
// Anthropic API request
  var apiUrl = "https://api.anthropic.com/v1/complete";
  var payload = {
    "prompt": prompt,
    "model": "claude-v1",
    "max_tokens_to_sample": 2000,
    "stop_sequences": ["\n\nHuman:"],
    "temperature": 0.5
  };
  var options = {
    "method": "POST",
    "headers": {
      "Content-Type": "application/json",
      "X-API-Key": apiKey,
      "anthropic-version": "2023-06-01"
    },
    "payload": JSON.stringify(payload),
    "muteHttpExceptions": true
  };
  var response = UrlFetchApp.fetch(apiUrl, options);
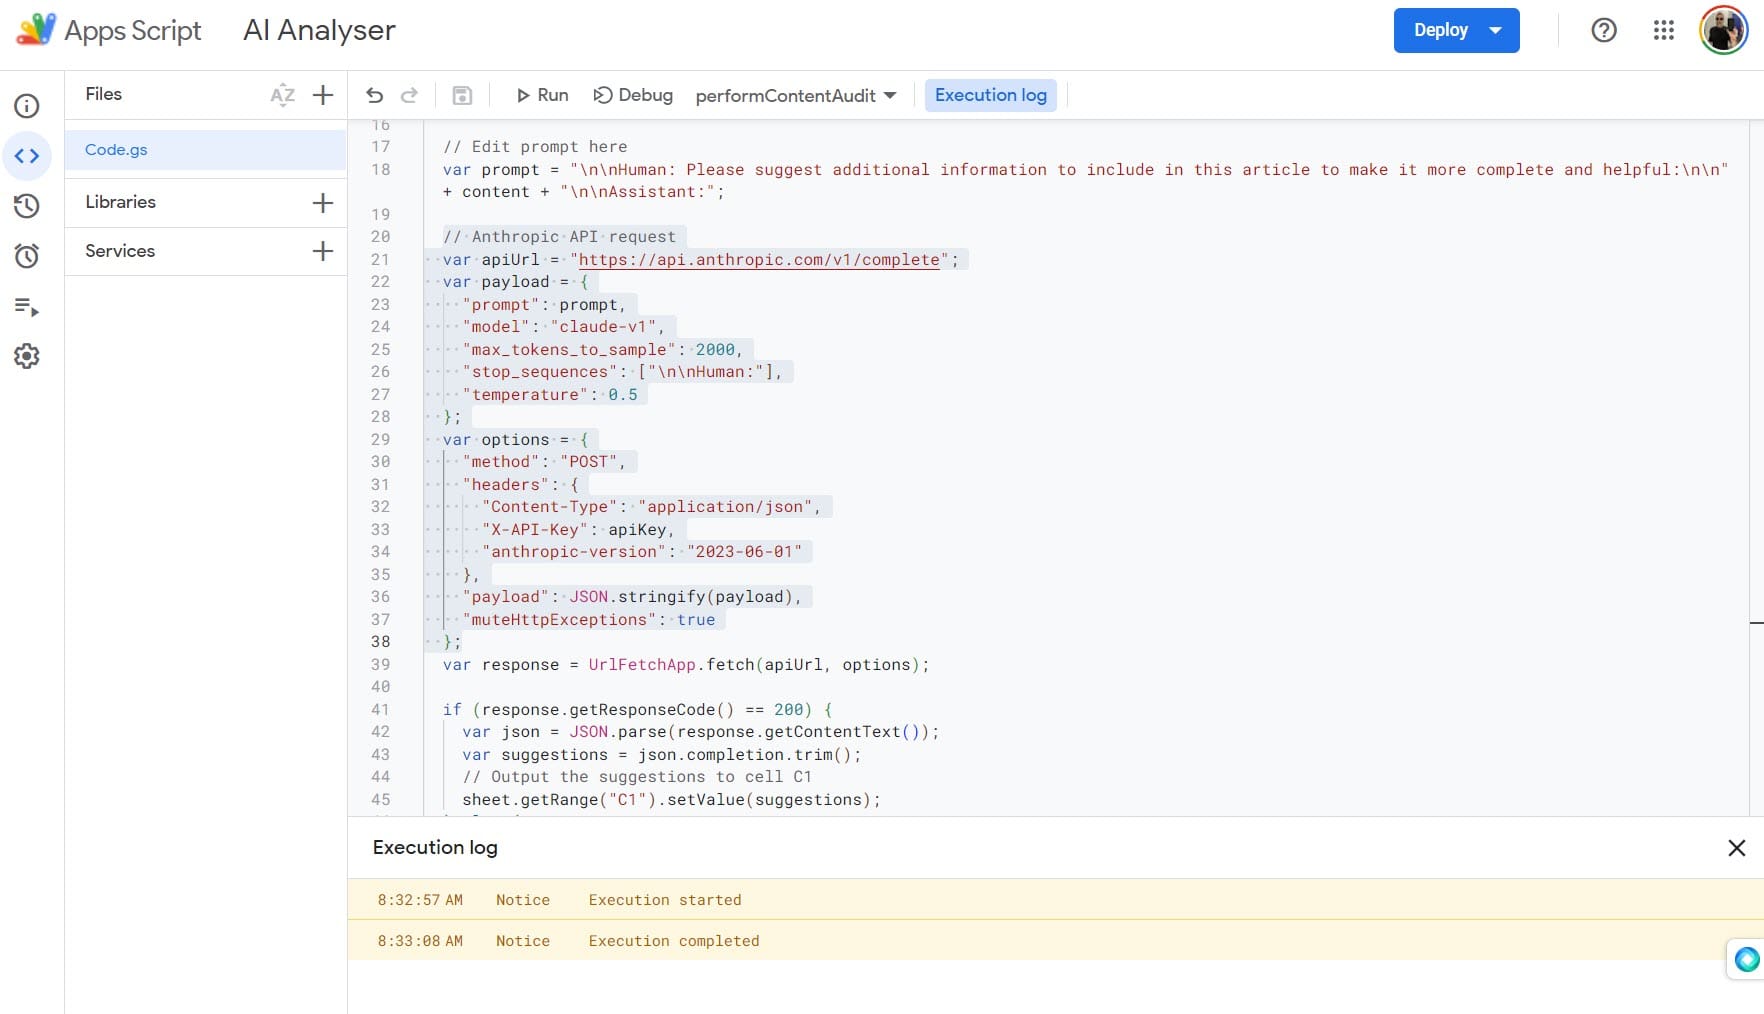
Here's the full code which you can add and save in the Apps Script Editor. Be sure to create a new sheet and enter your URL for analysis into cell A1 and your API key into cell B2. Save and run the script, allow it to execute (this can take a moment) and return to your Sheet to see the results.
function performContentAudit() {
  var sheet = SpreadsheetApp.getActiveSheet();

  // Url for analysis
  var url = sheet.getRange("A1").getValue();

  // Anthropic API Key in Cell B1
  var apiKey = sheet.getRange("B1").getValue();

  function fetchContent(url) {
    var response = UrlFetchApp.fetch(url);
    return response.getContentText();
  }

  var content = fetchContent(url);

  // Edit prompt here
  var prompt = "\n\nHuman: Please suggest additional information to include in this article to make it more complete and helpful:\n\n" + content + "\n\nAssistant:";

  // Anthropic API request
  var apiUrl = "https://api.anthropic.com/v1/complete";
  var payload = {
    "prompt": prompt,
    "model": "claude-v1",
    "max_tokens_to_sample": 2000,
    "stop_sequences": ["\n\nHuman:"],
    "temperature": 0.5
  };
  var options = {
    "method": "POST",
    "headers": {
      "Content-Type": "application/json",
      "X-API-Key": apiKey,
      "anthropic-version": "2023-06-01"
    },
    "payload": JSON.stringify(payload),
    "muteHttpExceptions": true
  };
  var response = UrlFetchApp.fetch(apiUrl, options);

  if (response.getResponseCode() == 200) {
    var json = JSON.parse(response.getContentText());
    var suggestions = json.completion.trim();
    // Output the suggestions to cell C1
    sheet.getRange("C1").setValue(suggestions);
  } else {
    // API request error handling
    var errorMessage = "API request failed with status code: " + response.getResponseCode() + "\nError message: " + response.getContentText();
    sheet.getRange("C1").setValue(errorMessage);
  }
}
Here's how it looks:
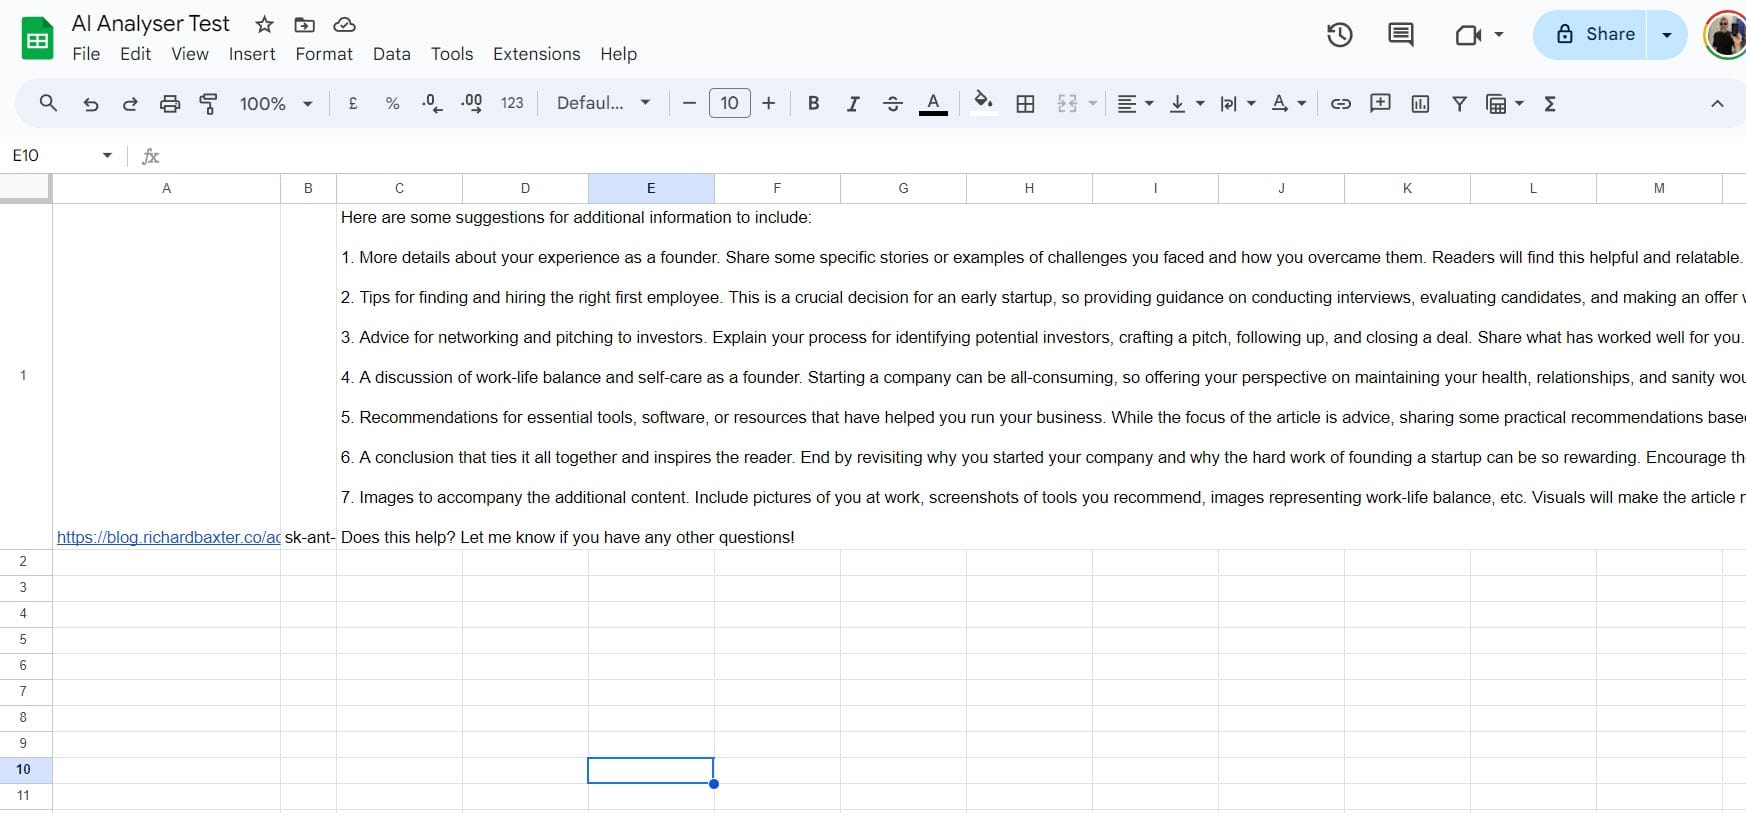
There are always limitations, the most notable being the maximum token size for the prompt.
If you POST a request exceeding the maximum token limit of 102398 tokens, you'll get a 400 error. This could be fixed by truncating the request (losing some of the prompt context, but probably not enough to cause much of a difference to the usefulness of the result.
The other thing, of course, is the cost of the API calls. This is why my example doesn't feature the ability to batch lots of requests. We're talking small money (I used about $10 worth of credits to get this far) but, it'll soon add up.
I've moved to Replit using Python to prototype several useful content tools based on this idea. The end goal is having this running on my local machine using an appropriately picked open source LLM. TBC.
Enjoy!